
 |
| word problem bundle |
I have now UPDATED the entire bundle to include digital images of each word problem (all three levels!) to be included in your Google Slides activities. This could also be used in many other digital learning formats - Google Slides and Google Classroom is just what I've had to use this year.
Here's how to use create a word problem slide activity:
1. Open up a new Google Slides:

2. Decorate the background however you like - maybe you have a usual format you follow. I like to use the shapes tool to create a coloured box at the top with the instructions:

3. Enter any instructions you may have:

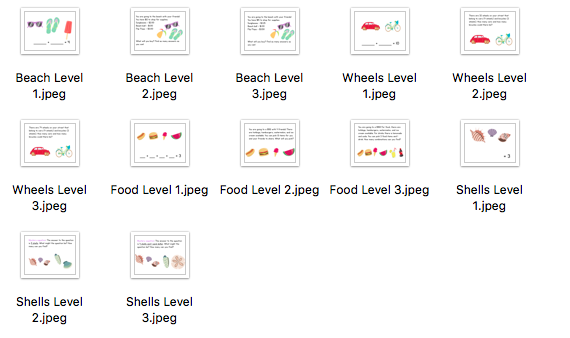
4. In the Word Problems file, you will see a pdf with the printable word problems and a folder with the digital problems for each month:


7. There you have it! You can assign it to the student(s) who are working at that level. You can include a blank slide afterwards for their workspace, or ask that they complete their work on paper and submit a photo of their thinking.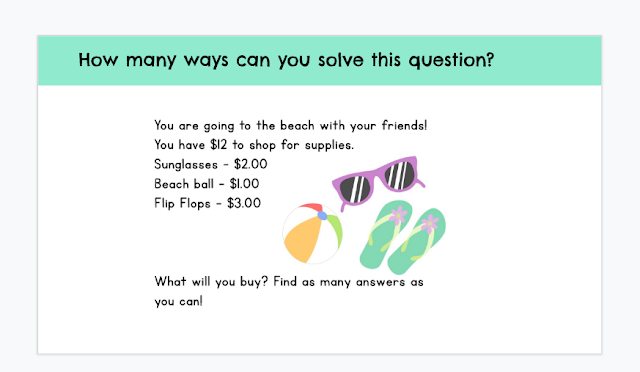
There you have it! Digital math learning with a few button clicks. :)


5. Open the folder. They are organized by problem and by level:
6. Choose the level of problem you want and drag it directly into your slide:

7. There you have it! You can assign it to the student(s) who are working at that level. You can include a blank slide afterwards for their workspace, or ask that they complete their work on paper and submit a photo of their thinking.

There you have it! Digital math learning with a few button clicks. :)


